使用 VSCode 开发嵌入式
因为是开源的,所以不用寻找激活码或者破解,非常方便、高效,还可以同时配置 esp32 开发环境,或者开发纯软件
环境与工具
- Windows 10
- STM32CubeMX
- vscode
- MinGW
- OpenOCD
- arm-none-eabi-gcc
STM32CubeMX
下载最新版即可
下载链接:
https://www.st.com/en/development-tools/stm32cubemx.html#get-software
OpenOCD
OpenOCD是用于对STM32进行下载仿真的工具,是一个开源软件包,解压到某个目录,后面会在Clion中链接这个目录
下载地址:
https://link.zhihu.com/?target=http%3A//gnutoolchains.com/arm-eabi/openocd/
下载完成之后将 bin 目录添加到系统环境变量中
右键 “此电脑” -》 “属性” -》找到 “高级系统设置” -》 “环境变量” -》”系统变量” -》”path”双击 -》”新建”
vscode
下载地址:
https://code.visualstudio.com/Download
同样把 vscode 的安装 bin 目录添加到系统环境变量中
MinGW
具体参考我的另一篇文章,”CLion 嵌入式”
下载完成之后将mingw64/bin 目录添加到系统环境变量中
arm-none-eabi-gcc
下载链接:
https://developer.arm.com/downloads/-/gnu-rm
解压后将 bin目录添加到系统环境变量中
所有环境配置完成之后
打开 cmd 依次输入,如果都有信息输出则为配置成功
mingw32-make -v
arm-none-eabi-gcc -v
openocd -v
创建工程
打开 cubeMX 配置好板子之后
工程管理Toolchain/IDE 选择 Makefile 就可以

在生成的工程文件夹中,打开终端 cmd ,输入
code .
表示用 vscode 打开,如果报错说明 vscode 没有正确添加到系统目录中,也可以拖动打开
在终端中输入,就可以对工程进行编译
mingw32-make
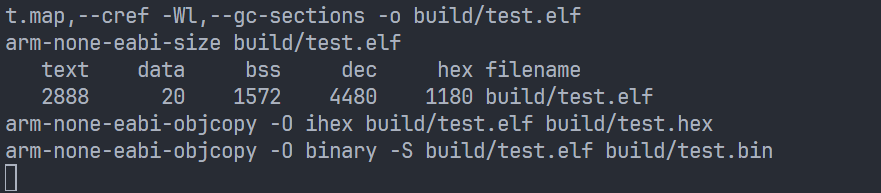
如果没有问题会显示下面的输出,并在工程文件夹中生成 build 目录
以及 elf 、hex\bin 文件
下载到硬件
如果是 DapLink
openocd -f interface/cmsis-dap.cfg -f target/stm32f1x.cfg -c "program build/<工程名>.elf verify reset exit"
如果是 ST-Link
openocd -f interface/stlink.cfg -f target/stm32f1x.cfg -c "program build/<工程名>.elf verify reset exit"
其中 stm32f1x.cfg 可以在 openocd 安装目录 share/openocd/scripts/target,中找到适合自己的板子进行更换
<工程名> 表示需要替换成自己的工程名
配置任务
如果是输入命令行的方式编译和下载非常的不方便,所以需要在 vscode 中创建任务,我们只执行任务就可以了
点击终端->配置任务->创建 / 打开 task.json
以后的开发只需要把这个文件复制到 .vscode目录下就可以
{
  // See https://go.microsoft.com/fwlink/?LinkId=733558
  // for the documentation about the tasks.json format
  "version": "2.0.0",
  "tasks": [
    {
      "label": "download",
      "type": "shell",
      "command": "openocd",
      "args": [
        "-f",
        "interface/stlink.cfg",
        "-f",
        "target/stm32f1x.cfg",
        "-c",
        "program build/test.elf verify reset exit"
      ],
      "presentation": {
        "echo": true,
        "reveal": "always",
        "focus": true,
        "panel": "shared",
        "showReuseMessage": false,
        "clear": false
      },
      "problemMatcher": []
    },
    {
      "label": "build",
      "type": "shell",
      "command": "mingw32-make",
      "args": [
        "-j8"
      ],
      "presentation": {
        "echo": true,
        "reveal": "always",
        "focus": true,
        "panel": "shared",
        "showReuseMessage": false,
        "clear": false
      },
      "group": {
        "kind": "build",
        "isDefault": true
      }
    },
    {
      "label": "clean",
      "type": "shell",
      "command": "make",
      "args": [
        "clean"
      ],
      "presentation": {
        "echo": true,
        "reveal": "always",
        "focus": true,
        "panel": "shared",
        "showReuseMessage": false,
        "clear": false
      }
    },
    {
      "label": "rebuild",
      "type": "shell",
      "dependsOrder": "sequence",
      "dependsOn": [
        "clean",
        "build"
      ]
    }
  ]
}
熟悉的命令行就变成配置内容,并且填写在这个文件中了,然后可以找到对应位置修改
运行任务时:
点击终端 -> 运行任务 -> build / download
调试程序
编译和下载完成之后就可以进一步调试了
点击左边工具栏有虫子的图标 -》运行和调试 -》 创建launch.json文件 -》选择cortex-debug
默认会创建一个jlink的配置
替换为
{
    "version": "0.2.0",
    "configurations": [
        {
            "name": "Cortex Debug",
            "cwd": "${workspaceFolder}",
            "svdFile": "STM32F103.svd",
            "executable": "build/<工程名>.elf",
            "configFiles": [
                "interface/stlink.cfg",
                "target/stm32f1x.cfg",
            ],
            "request": "launch",
            "type": "cortex-debug",
            "runToEntryPoint": "main",
            "servertype": "openocd",
            "liveWatch": {
                "enabled": true,
                "samplesPerSecond": 1
            }
        }
    ]
}
按下 F5 进入调试
printf 重定向
使串口支持 printf 和 fprintf(可选)
在makefile的145行左右,添加以下代码
-u_printf_float -u_fprintf_float
重写函数
//printf的重定向
//1、使用printf一定要加\n
//2、使用时 包含stdio.h
//3、makefile 145h 加-u_printf_float以支持输出浮点数 printf输出到设备
//4、makefile 145h 加-u_fprintf_float以支持fprontf输出浮点数 fprintf输出到文件
#ifdef __GNUC__
    #define PUTCHAR_PROTOTYPE int __io_putchar(int ch)
#else
    #define PUTCHAR_PROTOTYPE int fputc(int ch, FILE *f)
#endif
PUTCHAR_PROTOTYPE
{
  uint8_t temp[1]={ch};
  HAL_UART_Transmit(&huart1,temp,1,0xffff);//要提前配置huart1,PA9_TX PA10_RX
  return ch;
}
int _write(int file, char *ptr, int len)
{
  int DataIdx;
  for (DataIdx=0;DataIdx<len;DataIdx++)
  {
    __io_putchar(*ptr++);
  }
  return len;
}
使用时
printf("hello world \n");