Vue
声明周期

cdn 引入文件
 <script type="text/javascript" src="js/vue.js"></script>

 <div>{{变量/方法}}</div>
创建对象
var duixiang = new Vue({
    //元素id
     el: '#done',
    //定义变量
     data: {
            bianliang: [],
     },
    /*
        或者写为
        data() {
            return {
                bianliang: [],
            }
        }
    */
    //页面加载后就执行的函数
     mounted: function() {},
     methods: {
         fangfa() {
             console.log("Vue");
         },
     }
});
vue 指令
v-clock(去除闪动问题)
[v-clock] {
    display: none;
}
<div v-clock>...</div>
v-bind
动态绑定属性/简写为“:”
标签属性
<a v-bind:href="变量"> <img v-bind:src="变量"></a>
class属性
 v-bind:class="{类名1:boolean,类名2:boolean}"

//结合数组
 v-bind:class="[类名,类名,{类名1:boolean,类名2:boolean}]"
style属性
 //用驼峰命名,或是用单引号‘’
:style="{key(attributeName):value(attributeValue),}

//数组语法
:style="[object1,object2,…]
 object1: {color: red};
v-on
事件监听/简写为@
<button @click="方法()"></button>
访问原始的 DOM 事件。可以用特殊变量 $event 把它传入方法
@click="show('vue',$event)"
//作为最后一个参数显示传递,只用函数传递则默认传递事件

//获取事件类型
console.log(event.type)
// 事件源,就是发生事件的元素;
console.log(event.target)
修饰符
<!-- 阻止单击事件继续传播 -->
<a v-on:click.stop="doThis"></a>

<!-- 提交事件不再重载页面 -->
<form v-on:submit.prevent="onSubmit"></form>

<!-- 点击事件将只会触发一次 -->
<a v-on:click.once="doThis"></a>
v-if
判断条件渲染内容
<h2 v-if="条件或boolean">{{excellent}}</h2>
<h2 v-else-if="条件或boolean">{{good}}</h2>
<h2 v-else>{{变量}}</h2>
v-show 与 v-if 差不多相同
v-if 与 v-show区别
v-if控制元素是否渲染
v-show控制元素是否显示
v-for
遍历数组
 <ul v-for="(item,index) in 数组">//(v,k)
        <li>{{item}} index={{index}}</li>
 </ul>
:key的作用:帮助vue区分不同元素,以提高性能
<ul v-for="(item,index) in 数组" :key="item.id">//(v,k)></ul>
遍历对象
<ul v-for='(v.k.i) in obj'></ul>
添加条件
<ul v-if='v==xx' v-for='(v.k.i) in obj'></ul>
v-model
表单和数据双向绑定,数据变化则同时变化
msg{{msg}}

v-model="msg"
<!--复选框-->
<select v-model="selected" multiple >
        <option disabled value="">请选择</option>
        <option>选项</option>
    </select>
修饰符
**.number: ** 自动将用户的输入值转为数值类型
<input v-model.number="age" type="number">
.trim : 自动过滤用户输入的首尾空白字符
<input v-model.trim="msg">
响应式数据
Vue.set(vm.list, 2, "xxx");
vm.$set(list, 1, "xxx");
监听器
data: {
    name:'',
    info: {
        userName: '',
    }
},
watch: {
   name: function(newVal, oldVal) {
       console.log("aaa")
   },
   //监听对象
   info: {
       handler(newVal) {
           console.log(newVal)
       },
       //开启深度监听,只要对象中任意有变化则触发监听
       deep: true,
       //组件初始化后立即加载组件(监听在初始化后不会立即调用)
       immediate: true,
   },
   //监听对象属性
   'info.userName'(newVal) {
           console.log(newVal)
   }
}
计算属性
computed: {
    //定义是以方法的格式,使用是以属性的格式
    total() {
        return a + b;
    }
}
//{{total}}
Vue 组件
注册组件
全局组件(所有Vue实例化中都可以使用)
//组件不支持驼峰

Vue.component('组件名',{//组件的名称
    data: function() {
          return: {}
    },
     template:'<h2>全局组件</h2>'//template是创建模板
    method: {
        say() {console.log("abc")}
    }
})
/*
    或者
    const cnpC = Vue.extend({
        template: `<div>
                         <h2>标题</h2>
                         <p>模板内容</p>
                  <div/>`
    });
    // 2.注册全局组件(tagName,component)

    Vue.component('my-cmp', cnpC);
*/

//全局组件需定义在Vue实例化之前
局部组件(只能当前实例化可用)
 new Vue({
     el:'#app',
     // 局部组件注册是components带s,注册全局组件不用带s
     components:{
             "组件名":{        //组件名称
                 template:'<div><h2>标题</h2> <p>模板内容</p><div/>'//模板
             }
      }
})
用模板注册组件
<template id = "tempid">
   <div>
      <h2>标题</h2>
       <p>模板内容</p>
   <div/>`
</template>

<!--
    在全局和局部组件中
    template: 'tempid',

-->
<style >
    //直接修改子组件的样式
    /deep/ h3 {
        color: blue;
    }
</style>
使用时
<组件名></组件名>
组件嵌套
new Vue({
 el:"#app",
 components:{
     father:{          //father是个组件
         template:'<div>这是father组件... <son></son></div>',
               components:{  //这个components是在father组件里面的
                   son:{   //又定义一个组件son
                         template:'<div>这是son组件...</div>'
                    }
               }
         }
   }
})
//使用时
//<father></father>
组件之间传值
父传参数给子(单向数据流)
props
data: {
    mag:mag,
},
components:{
     zi:{
         template:'<div>这是father组件... <son></son></div>',
         props:['mag'],
         //也可以传对象
         props: {
             //设置默认值
             default: 0,
             //限制类型
             type: Number,
             //设置必填
             required: true,
         }
      }
}

//使用时结合v-bind
//<zi :msg="mag"></zi>
子传参数给父
//<zi @click="$emit('fudo', can)/zido()"></zi>
method: {
    zido() {
       this.$emit('fudo', can);
    }
}
//<fu @fudo="fudo">
非父子组件传值
//事件中心
var eventHub = new Vue();

//监听与销毁事件
eventHub.$on('add-do', do);
eventHub.$off('add-do', do);

//传递数据
eventHub.$emit('add-do',传值/{});

//<div @add-do='do($event)'></>
兄弟组件传值
eventBus.js
- 创建 eventBus 实例
import Vue from 'vue'
export default new Vue();
- 发送模块
import bus from './eventBus.js'
//通过eventBus 发送文件
bus.$emit('share', this.mes)
- 接收模块
import bus from './eventBus.js'

bus.$on('share', mes => {
    console.log(mes)
})
父组件调用子组件
/*
    使用子组件内部的方法
    <!--给组件绑上一个ref属性,例如tree-->
    <Tree :data="data2" ref="tree" show-checkbox></Tree>

    <!--给标签绑上一个ref属性,可以操作DOM-->
*/

//然后就可以使用组件里的方法获取返回值
console.log(this.$refs.tree.getCheckedNodes())
this.$refs.tree.show()
this.$nextTick(cd)
组件的 $nextTick(cd) 方法会把 cd 回调推迟到下一个 DOM 更新周期后执行
(DOM 更新完成后,操作最新的DOM)
子组件调用父组件方法
1、this.$parent.event 来调用父组件的方法。
父组件
 methods: {
      fatherMethod() {
        console.log('调用父组件方法');
      }
 }
子组件
//<button @click="childClick()">点击</button>

childClick() {
  this.$parent.fatherMethod();
}
2、在子组件里用 $emit向父组件触发一个事件,父组件监听这个事件。
父组件
//<child @fatherMethod="fatherMethod"></child>


methods: {
   fatherMethod() {
      console.log('调用父组件方法');
   }
 }
子组件
//<button @click="childClick()">点击</button>

methods: {
      childClick() {
        this.$emit('fatherMethod');
      }
 }
3、父组件把方法传入子组件中,在子组件里直接调用这个方法。
父组件
<child :fatherMethod="fatherMethod"></child>
子组件
//<button @click="childClick()">点击</button>

props: {
    fatherMethod: {
        type: Function,
        default: null
    }
},
methods: {
    childClick() {
        if (this.fatherMethod) {
          this.fatherMethod();
        }
    }
}
切换使用组件
<component :is="组件名"></component>
keep-alive
切换组件时将不会被销毁
//选择包含的组件 include / 不包含 exclude
<keep-alive include="组件名">
    <component :is="组件名"></component>
</keep-alive>
组件被缓存时
deactivated() {}
组件被激活时
activated() {}
provide 与 inject
- 在祖先组件定义
provide属性,返回传递的值 - 在后代组件通过
inject接收组件传递过来的值
祖先组件
provide(){
    return {
        foo:'foo'
    }
}
后代组件
inject:['foo'] // 获取到祖先组件传递过来的值
vuex
- 适用场景: 复杂关系的组件数据传递
-
Vuex作用相当于一个用来存储共享变量的容器
项目应用 VUEX
npm i vuex --save
main.js
import Vue from 'vue'
import Vuex from 'vuex'

Vue.use(vuex)
const store = new Vuex.Store({})

new Vue({
    el: '#app',
    store
})
state
const store = new Vuex.Store({
    state: {
        count: 0
    }
})
组件中
<template>
    {{$store.state.count}}
</template>

// 利用计算属性简写
computed: {
    count() {
        return this.$store.state.count
    }
}
辅助函数
mapstate
import { mapstate } from 'vuex'

// 利用计算属性
computed: {
    // 延展运算符
    ...mapState(['count'])
}
mutations
修改 state 的方法
const store = new Vuex({
    // 立即执行 (同步)
    mutations: {
        updateCount(state, payload) {
            state.count += payload
        }
    }
})
组件使用
<template>
    <button @click="onChange"></button>
</template>
export default {
    methods: {
        onChange() {
            this.$store.commit('updateCount', param)
        }
    }
}
辅助函数
import { mapMutations } from 'vuex'

methods: {
    // 写入方法,与上面等同
    ...mapMutations(['updateCount'])
}
actions
actions {
    async getData(context) {
        const { data: res } = await getDataApi(context);
    }
}
组件使用
export default {
    methods: {
        onChange() {
            this.$store.dispatch('getData', param)
        }
    }
}
辅助函数
import { mapActions } from 'vuex'

methods: {
    ...mapActions(['getData'])
}
getters
从state 派生出一些状态
state: {
      list: [2,34,5,45,65]
},
getters: {
    // getters函数的第一个参数是 state
    // 必须要有返回值
    filterList:  state =>  state.list.filter(item => item > 5)
}
组件中
export default {
    methods: {
        onChange() {
            this.$store.getters('getData', param)
        }
    }
}
辅助函数
import { mapGetters } from 'vuex'

computed: {
    ...mapGetters(['filterList'])
}
vuex模块化
const store = new Vuex({
    modules: {
        user: {
            state: {
                token: 'sdfsdfsdf'
            },
            mutations: {
                updataToken(state, ) {

                }
            }
        }
    }
})
组件中
<template> {{ $store.state.user.token}}</template>
使用getters 简化
// 根级别
getters {
    token: state => state.user.token
}
命名空间
modules: {
    user: {
        namespaced: true
    }
}
默认情况下,模块内部的 action、mutation 和 getter 是注册在全局命名空间的——这样使得多个模块能够对同一 mutation 或 action 作出响应。
未使用命名空间时
methods: {
    ...mapMutations(['updataToken'])
}
使用命名空间时
methods: {
    // 需要加入模块名
    ...mapMutation(['user/updataToken'])
    updata() {
        // 调用模块方法
        this['user/updataToken']()
    }
}
直接使用
this.$store.dispatch('user/updataToken')
命名空间辅助函数
import { createNamespacedHelpers } from 'vuex'
import { mapMutations } = createNamespaceHelpers('user')

methods: {
    ...mapMutations(['updataToken'])
    undata() {
        this.upodataToken(param);
    }
}
不同模块需要打包到 / modules不同 js 文件
/modules/user.js
export default {
    namespaced: true,
    state: {},
    mutations: {},
    actions: {},
    getters: {}
}
在 store/ index.js 中引入各模块
import user from './modules/user'
import mana from './modules/mana'

export default new Vuex.Store({
    modules: {
        user,
        mana
    }
})
在 main.js 导入store
import store from 'store'

export default {
    el: '#app',
    store
}
插槽
具名插槽并传值
<template id="template">
     <div>
         <slot name="slot1" msg="hello">我是插槽默认内容</slot>
     </div>
</template>

<!--使用时-->
<zujian>
    <p slot="slot1">
        自动替换插槽
    </p>
</zujian>
或者
<zujian>
    // 简写为 #slot1="scope"
    // {{scope.msg}} 打印子组件插槽的msg
    // 叫做作用域插槽
    <template v-slot:slot1>
        <p>
            自动替换插槽
        </p>
    </template>
<zujian>
自定义指令
自定义指令也像组件那样存在钩子函数:
-
bind:只调用一次,指令第一次绑定到元素时调用。在这里可以进行一次性的初始化设置 -
inserted:被绑定元素插入父节点时调用 (仅保证父节点存在,但不一定已被插入文档中) -
update:所在组件的VNode更新时调用,但是可能发生在其子VNode更新之前。指令的值可能发生了改变,也可能没有。但是你可以通过比较更新前后的值来忽略不必要的模板更新 -
componentUpdated:指令所在组件的VNode及其子VNode全部更新后调用 -
unbind:只调用一次,指令与元素解绑时调用
所有的钩子函数的参数都有以下:
el:指令所绑定的元素,可以用来直接操作DOMbinding:一个对象,包含以下property:name:指令名,不包括v-前缀。value:指令的绑定值,例如:v-my-directive="1 + 1"中,绑定值为2。oldValue:指令绑定的前一个值,仅在update和componentUpdated钩子中可用。无论值是否改变都可用。expression:字符串形式的指令表达式。例如v-my-directive="1 + 1"中,表达式为"1 + 1"。arg:传给指令的参数,可选。例如v-my-directive:foo中,参数为"foo"。modifiers:一个包含修饰符的对象。例如:v-my-directive.foo.bar中,修饰符对象为{ foo: true, bar: true }
vnode:Vue编译生成的虚拟节点oldVnode:上一个虚拟节点,仅在update和componentUpdated钩子中可用
directives: {
    color: {
        // 指令第一次绑定后就会调用
        // el 为绑定的元素
        // bindind 表示指令传入的数据
        bind(el, binding) {
            console.log(binding.value)
        },
        //update 每次DOM更新时调用
        update(el, binding) {
            console.log(binding.value)
        }
    }
    //当bind 和 update 是相同的逻辑,可以直接结合
    color(el, bindind) {
        console.log(binding.value)
    }
}
全局自定义指令实现Copy功能
Vue.directive('copy', {
    bind: (el, { value }) => {
        el.$value = value;
        el.handler = () => {
            if (!el.$value) {
                console.log("内容为空")
                return;
            }
            const textarea = document.createElement('textarea');
            textarea.readOnly = 'readOnly';
            textarea.style.position = 'absolute';
            textarea.style.left = '-6666px';
            textarea.value = el.$value;
            document.body.appendChild(textarea);
            textarea.select();
            if (document.execCommand('Copy')) {
                console.log("复制成功");
            }
            document.body.removeChild(textarea);
        };
        //绑定事件
        el.addEventListener('click', el.handler);
    },
    //当传进来的值更新的时候触发
    componentUpdated(el, { value }) {
        el.$value = value;
    },
    //指令与元素解绑的时候
    unbind(el) {
        el.removeEventListener('click', el.handler);
    }
})
Promise
处理异步任务
var p = new Promise(function(resolve, reject) {
    let xml = new XMLHttpRequest();
    //成功调用resolve(xml.responseText)否则reject('xxx')
});
p.then(function(ret) {
    //从resolve得到正常结果
    },function()(ret) {
    //从reject得到错误结果
     }
)
/*
     =
     .then(function() {
    })
    .catch(function() {

    });
*/
.then(function() {
    console.log()
})
常用API
//并发处理异步任务,所有任务执行完后得到结果
Promist.all([p1.p2.p3]).then((result) => {
    console.log(result)
})

//并发处理异步任务,只要有一个任务执行完后得到结果
Promist.all([p1.p2.p3]).then((result) => {    console.log(result)
})
fetch
fetch('url',{
    method: 'DELETE//',
    body: '=&=',
    headers: {
        'Content-Type': 'application/x-www-form-urlencoded'
    }
})
.then(function() {
})
.then();
axios
axios.get('url',{
    params:{
        name: "",
    }
}).then(function(res) {
        console.log(res.data)
});

axios.post('url',{
    //默认json格式
    name:"",
})
//传递表单参数
const params = new URLSearchParams();
params.append('param1','value1');
axios.post('url', params).then()
基准URL地址
axios.defaults.baseURL = 'http://localhost:3000/';
拦截器
请求拦截器
axios.interceptors.request.use(function(config) {
    config.headers.mytoken = 'nihao';
    return config;
}, function(err) {
    console.log(err)
})
axios.get()
响应拦截器
axios.interceptors.response.use(function(res) {
    return res.data
},function(){})
async/await
//async返回值是Promise实例对象
async function queryData() {
    let res = await axios.get('data');
    return res.data;
}

queryData().then(function(data) {
    console.log(data)
})
路由
原理是监听window的onhashchange事件
window.onhashchange = function(){
    console.log(location.hash)
}
vue-router
路由链接
<!--router-link默认会被渲染成a标签-->
<!--to会被渲染成href属性-->
<!--to属性值会被渲染为#开头的hash地址-->
<router-link to="/user" >user</router-link>
路由占位
<router-view></router-view>
路由规则
import router from 'VueRouter'

new router({
    //path表示当前路由规则的hash地址
    //component表示路由规则对应展示的组件
    routes: [
        {path:'/user', component: User}
    ]
})
挂载路由实例对象
import router from 'VueRouter'

new vue({
    router,
}).$mount(#app)
路由重定向
routes: [
    {path: '/', redirect: '/user'},
]
嵌套路由
子级路由模板
<template>
    <router-link to="/父/子"></router-link>

    //子路由占位符
    <router-view></router-view>
</template>
路由规则
{
    path: '/fu',
    component: fu,
    children: [
        {path: '/fu/zi', component: zi},
    ]
}
动态匹配
routes: [
    //路径参数
    {path: '/user/:id', component: User}
]

//组件中访问路径参数
<template>
    {{ $route.params.id }}
</template>
另一种方式
组件内传递动态参数
<template>
    // 对象不拼接字符串
    <router-link :to="{
        name: 'zujian',
        params: {
            id: canshu
        }
    }">
    // 拼接字符串
    <router-link :to="`zujiam/${id}`">
    </router-link>
    //子路由占位符
    <router-view></router-view>
</template>
// router/index.js
routes: [
    // 开启组件传参
    {path: '/user/:id', component: User, props: true}
]

// user.vue
<template>
    {{ id }}
</template>

export default {
    props: ['id']
}
props指定类型
props: route => ({xxx: 'xx', xx: 'xx', xx: route.params.xx})
命名路由
routes: [
    {
        path:  '',
        name: 'user',
    }
]
<router-link :to="{name :'user', params:{id;xx}}"></router-link>
编程式导航
//跳转并怎加历史记录
this.$route.push('/path')
//替换不怎加历史记录
this.$route.replace('/path')

//命名路由带参数
this.$route.push({name: '', params: {id: xxx}})

//带查询参数  /xxx?id=xxx
this.$route.push({path: '', query: {id: xxx}})

//历史记录前进或后退
// - nums (表示层数)
this.$route.go(-1)
路由导航守卫
每次发生路由跳转就会触发
router.beforeEach((to, from, next) => {
    //to为将要访问的路径
    //from为从哪个路径跳转
    //next表示放行
    if(to.path == '/') return next() //next('/')
})
next的三种调用
//直接放行
next()
//跳转 path
next('/path')
//拒绝跳转
next(false)
减小入口文件体积
常用的手段是路由懒加载,把不同路由对应的组件分割成不同的代码块,待路由被请求的时候会单独打包路由,使得入口文件变小,加载速度大大增加
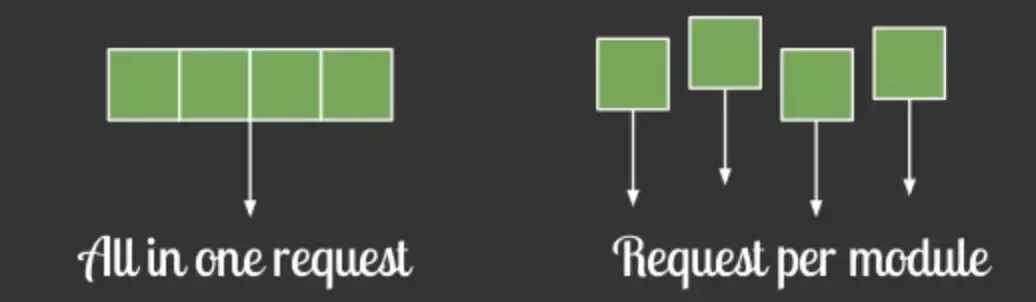
在vue-router配置路由的时候,采用动态加载路由的形式
routes:[
    path: 'Blogs',
    name: 'ShowBlogs',
    component: () => import('./components/ShowBlogs.vue')
]
以函数的形式加载路由,这样就可以把各自的路由文件分别打包,只有在解析给定的路由时,才会加载路由组件
文件上传
<template>
    <input
    type="file"
    hidden
    ref="file"
    @change="onFileChange"
    >
</template>
export default {
    methods: {
        onFileChange() {
            // 获取文件对象
            const file = this.$refs.file.files[0]
            // 获取 blob 数据
            const data = window.URL.createObjectURL(file)
        }
    }
}
图片裁切
cropperjs
https://github.com/fengyuanchen/cropperjs
参数
mouted() {
    const image = this.$refs.img
    const cropper = new Cropper(image, {
        // 0-裁剪扩展到画布外
        viewMode: 1,
        /*
            拖动模式
            drop - 拖动裁剪框
            move - 拖动图片
            none - 拖动固定框
        */
        dragMode: 'move',
        // 裁剪比例
        aspectRatio: 1 / 1,
        // 裁剪框撑满整个画布
        autoCropArea: 1,
        // 裁剪框是否可以移动
        cropBoxMovable: false,
        // 裁剪框是否可以缩放
        cropBoxResizable: false,
        // 背景
        background: false,
        // 画布移动(默认移动)
        movable: true
    })
}
methods: {
    onConfirm() {
        this.cropper.getCroppedCanvas().toBlob(blob => {
            log(blob)
            // 传递服务器
            const formData = new formData()
            formData.append('croppedImage', blob,"可选图片名")
            // axios
        })
    }
}
vue/cli脚手架
特点
开箱即用
0配置webpack
babel支持
css, less支持
开发服务器支持
全局安装命令
yarn global add @vue/cli
# OR
npm install -g @vue/cli
查看脚手架版本
vue -V
@vue/cli 创建项目启动服务
目标: 使用vue命令, 创建脚手架项目
==注意: 项目名不能带大写字母, 中文和特殊符号==
创建项目
# vue和create是命令, vuecli-demo是文件夹名
vue create vuecli-demo

#手动选择需要的
Manually select features

#(*)空格选择
# no history mode -> hash模式
# Standard config
# lint in save
# dedicated config files
# Sava preset(模板)
图形化创建
vue ui

#选择手动配置
#babel,router,linter/Formatter,使用配置文件
#与以上相同
进入脚手架项目下, 启动内置的热更新本地服务器
cd vuecil-demo

npm run serve
# 或
yarn serve
打开浏览器输入上述地址

目录和代码分析
 vuecil-demo        # 项目目录
    ├── node_modules # 项目依赖的第三方包
    ├── public       # 静态文件目录
      ├── favicon.ico# 浏览器小图标
      └── index.html # 单页面的html文件(网页浏览的是它)
    ├── src          # 业务文件夹
      ├── assets     # 静态资源
        └── logo.png # vue的logo图片
      ├── components # 组件目录
        └── HelloWorld.vue # 欢迎页面vue代码文件
      ├── App.vue    # 整个应用的根组件
      └── main.js    # 入口js文件
    ├── .gitignore   # git提交忽略配置
    ├── babel.config.js  # babel配置
    ├── package.json  # 依赖包列表
    ├── README.md    # 项目说明
    └── yarn.lock    # 项目包版本锁定和缓存地址
@vue/cli 自定义配置
目标:项目中没有webpack.config.js文件,因为@vue/cli用的vue.config.js
src并列处新建vue.config.js
/* 覆盖webpack的配置 */
module.exports = {
  devServer: { // 自定义服务配置
    open: true, // 自动打开浏览器
    port: 3000
  }
}
Element-UI
安装依赖
yarn add element-ui -S
导入资源
//组件库
import ElementUI from 'element-ui';
//导入样式
import 'element-ui/lib/theme-chalk/index.css';
//配置插件
Vue.use(ElementUI)
图形化安装
vue-cli-plugin-element
eslint
代码检查工具
暂时关闭
方式1: 手动解决掉错误, 以后项目中会讲如何自动解决
方式2: 暂时关闭eslint检查(因为现在主要精力在学习Vue语法上), 在vue.config.js中配置后重启服务
module.exports = {
    lintOnSave: false,//关闭eslint检查
}
安装less依赖
less-loader -> less
导入element表单
import {Form, FormItem, Input} from 'element-ui'

Vue.use(Form)
Vue.use(FormItem)
Vue.use(Input)
导入弹框提示组件
import {Message} from 'element-ui'

//挂载到原型对象
Vue.prototype.$message = Message

this.$message.success("NIHAO")

//解决空白弹窗问题
import { Message } from 'element-ui'

Vue.component(Message.name, Message)

Vue.prototype.$message = Message
配置axios
import axios from 'axios'

axios.defaults.baseURL = '127.0.0.1'

Vue.prototype.$http = axios

//调用时
async () =>
//结构赋值
const {data: res} = await this.$http.post('',data)
解决代码复用问题
新建 utils 目录,建立 request.js 文件
import axios from 'axios'

const request = axios.create({
    baseURL: 'http://xxx'
})

export default request
配置axios 拦截器
import axios from 'axios'

const request = axios.create({
    baseURL: 'http://xxx',
    timeout: 5000
})

// 请求拦截器
request.interceptors.request.use(
    config => {
        return config
    },
    error => {
        return Promise.reject(error)
    }
)
// 响应拦截器
request.interceptors.response,use(
    response => {
        const res = response.data
        return res
    },
    error => {
        return Promise.reject(error)
    }
)

export default request
封装 API
API 下不同的文件夹来表示请求不同的数据
//调用封装的工具来发起请求
import request from 'utils/request.js'

// export function getxxxAPI() {}
export const getxxxAPI = (xxx) => {
    return request.get('url', {
        params: {
            xxx,
        }
    })
}
按需导入
import {getxxxAPI} from 'API/xxxAPI.js'

const {data: res} = await getxxxAPI(xxx);
vue使用节流函数
data() {
    this.AnaGet = this.throttle(this.AnaGet, 300)
    return {

    }
},
methods: {
    throttle(method, wait) {
        let timer = null;
        return function() {
            const context = this
            const args = arguments
            if(!timer) {
                timer = setTimeout(() => {
                    method.apply(context, args)
                }, wait)
            }
        }

    }
}
公共资源图片和统一样式
图片资源
图片资源在课程资料的图片文件中,我们只需要将**
common**文件夹拷贝放置到 **assets**目录即可
样式
样式资源在 资源/样式目录下
将两个文件放置到styles目录下,然后在**index.scss**中引入该样式
@import './common.scss'; //引入common.scss样式表
本节注意:注意在scss文件中,通过@import 引入其他样式文件,需要注意最后加分号,否则会报错
所遇问题
格式化文档
根目录创建”.prettierrc”(修改引号和分号)
{
       "semi": false,
    "singleQuete": true
}
$confirm闪退问题
<!--将a标签改为-->
<a href="javascript:viod(0)"></a>
访问其他组件成员
import zujian = from '/path'

zujian.data().成员
打包好的VUE项目空白
vue.config.js文件
module.exports = defineConfig({
  assetsDir: 'static',
  parallel: false,
  publicPath: './',
})